TRUAX STORM WINDOWS

Reasons to install exterior storm windows:
The primary purpose for installing storm windows is energy conservation. Exterior Storm Windows mount onto the exterior of the original window and create a dead air space between the storm window and the original window. This provides a U Value of approximately 0.5, compared to a U Value of about 1.0 for single glazed windows. So installing storm windows doubles the insulation value of the window opening.
A second purpose for storm window installation is to protect the exterior of the original window from wind and weather damage. This is particularly true for older wood windows that may already be showing signs of weather damage.
Another reason many people install exterior storm windows instead of window replacement is to preserve the beauty of their existing traditional wood windows. If the old wood windows have been well maintained, it is a real pity to replace them with vinyl replacements, or even new wood inserts. There is something about the patina of old fir windows that can’t be matched.
Take a look at the bottom of this page for STORM WINDOW INSTALLATION INSTRUCTIONS for aluminum storm windows.
Truax has been manufacturing custom aluminum storm windows for over 40 years!

Picture Storm Windows:

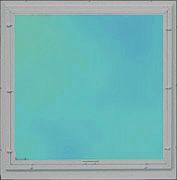
The storm window above is a fixed storm window with removable sash, and has the following standard features:
*Mitered corner construction
*Sill expander
*Mounting screws are supplied
Truax manufactures the #120 insert for larger sizes up to forty square feet. The heavy duty #120 accepts glass up to 3/16″ thick.
In addition, Truax sells the Larson brand fixed storm windows. We sell the aluminum framed storm window inserts without the main frames for applications requiring a minimum projection. The heavy 120 inserts are also available as round top storm inserts.
Truax storm windows include the following standard features:
*Mitered corner construction
*Weatherstriped frame
*Interlocking sash
*Sill expander
*Mounting screws are supplied
Truax storm window a self storing glass insert with turn clips for easy removal and cleaning.
In addition, Truax sells the full line of Larson Storm doors.
Truax provides service and repairs for storm windows and doors that are brought into our shop including glass replacement.
Wood Storm Windows
Truax has been manufacturing custom wood storm windows, wood screen doors, and wood storm doors for over 66 years
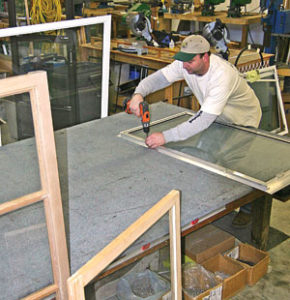
We offer professional installation of storm windows and storm doors in the Portland, Oregon area.
Storm Window Installation Instructions
1 Measure the width (A) at top, bottom, and in the middle of the window. Measure the height (B) from the sill at the face of the blind stop to the bottom of the exterior window trim. Take the dimensions just inside the exterior trim. There is normally a ½” wide blind stop just inside the trim and this is the surface you will screw the storm window to. Write down the smallest of the three width dimensions and the height dimension to get the correct storm window size to order.
2 Prepare the window for the new storm window. Scrape away any loose paint or caulking. Caulk and paint the window frame as needed.
3 Clean the outside of the window frame and glass, because after the storm window is installed, you cannot access the exterior of the window without removing the storm window inserts.
4 Caulk the back of the new storm window with butyl caulk* at the top and sides of the storm window only, This will help create a weather tight seal. A caulking gun and caulk are available at your local lumber or hardware store. Butyl caulk stays pliable and is paintable.
* As an alternative, purchase 1/8” by 3/8” foam tape with adhesive on one side and apply to the top and sides of the storm window where it will be in contact with the mounting surface. The tape makes the storm window easier to remove later.
5 Place the storm window against the window frame’s blind stop, being sure to mount as high as possible. This allows for the proper use of the expander bar (if needed). Make sure the storm window is square and plumb in the opening, and that the sides of the frame are not bowed in or out. Screw the storm window onto the window frame using ½“ long screws spaced about 12“ apart on the top and sides. The blind stop is thin, and a screw longer than ½” could interfere with the operation of the top sash on double hung windows. Use a screw gun for this.
6 Tap down the expander flashing at the bottom of the storm window (note that the expander is often on the top of the storm window for shipping purposes when you receive it, and should be removed and reinstalled on the bottom flange of the storm window) so that it rests against the window frame’s sill. The expander is a strip of metal supplied with the storm window, which slips onto the bottom flange of the storm window frame to close the gap between the storm window and the sill.
7 Don’t caulk the expander to the sill, since a slight gap here will reduce the chance of condensation between the primary window and the storm window. Your storm window(s) may steam up on the inside glass surface, because they are nearly airtight, and can trap moist air escaping through the old, less defective primary windows. To reduce condensation, leave a small gap under the bottom expander, 1/16” to 1/8”, to allow for a little air circulation.

